Branding - My logo design process in 5 steps
Designing a new brand identity or logo has always been one of my favorite projects. Especially when I am working with smart business owners who trust in the process and believe that a brand is imperative for their business. Whether creating a logo for a new start-up, or rebranding an exsisting business - the process before you get to the final logo and brand design is critical to the outcome.
Designing a brand is not as simple as one may think. However, it can be a very enjoyable process for both the client and designer when expectations are discussed and a mutual understanding is developed. Over the years I've developed a process for working with clients that I've stuck to and the results have been pivotal. After spending much time discussing the goals of the client, the nature of their business and the tone and values they would like their business to reflect, we are able to produce a well received brand.
To give you a better idea of how the process unfolds I've put together a step-by-step design process based on a recent client, Amy Beseth's new company Pride & Joy. In 2016 Amy launched "Pride & Joy Doula Services" to help aid other new mothers with devoted doula services. Amy, a mother of multiples herself, knew that her experience, knowledge and compassion for mother's would guide her in her company's brand and core values. When Amy embarked on her new business she knew that she wanted a professional logo and website that reflected her capabilities and spoke to her audience.

STEP 1: GET TO KNOW YOUR CLIENT
When I am first approached for a project (usually through client referrals - thanks guys!) I take the time to either speak with, meet or email the client first and really to get to know their personality. While this may seem obvious, its important to dig out what the clients goals are.
CLIENT INTERVIEW: Before the design starts, I gather bits of information from my clients including what are their top three goals for their website, what is the true nature of their business, what are their goals for their business, what brands do they love and why do they want to change their current logo? These questions may seem simple, but it really helps me get a knack for their brand.
SECERET PINTEREST BOARD: This is where the fun begins for most of my clients. I have clients fill a secret Pinterest board with visual inspirations for their brand so I understand the styles they like. I have them fill it with photos that inspire them, colors they like, objects they are drawn to, brands they admire, fonts they find visually appealing, etc.
Usually, patterns form in their pins that give me a solid direction. I can see their likes and dislikes easily, which is important for both parties. While I am a visual person and can describe things in a visual language, many clients have a hard time sayingwhat they like and don't like. With the Pinterest board they can show me with out having to describe it.
Until I have gathered these two things, I never start the design process. Taking the time to get to know a client and their style is imperative step to the process. And it's fun!!
STEP 2: BRAND MOOD BOARD & COLOR GUIDE
For the next step of the design process, I create a mood board with some of the images they pinned and images I find that I feel represent their style. I pull colors from the images to create a suggested color palette. I'll usually create one or two mood boards for the client depending on what styles they pin. Some clients are very consistent, while others might be pulled in more than one direction.
For Amy's project, I was able to get a feel for her style and colors right away. We both loved the idea of warm colors (representing sunshine) paired with cooler soft tones.
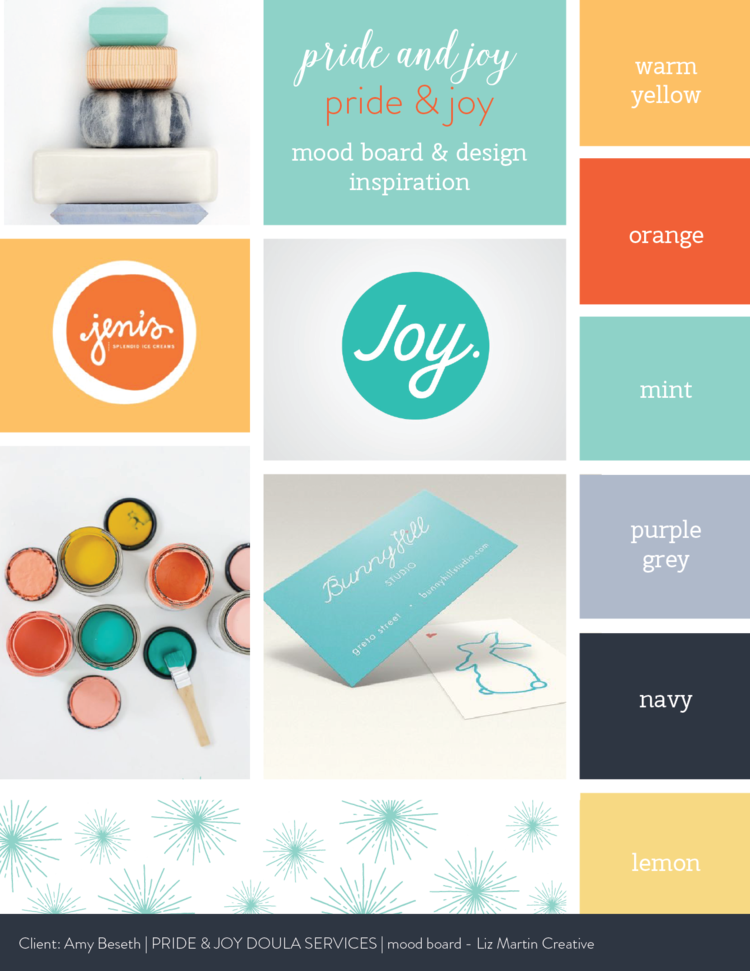
Once in the client's hands, we discuss the mood board and color options together. If the first round is not quite right we tweak another direction and perfect the style. In this instance, Amy loved the colors and style and was excited to move ahead.
STEP 3: INITIAL LOGO DESIGN DRAFTS
For this next step, I take all the information I have gathered from the client and begin to draw up a few different styled logos. I usually try not to create more than 4 styles (although their may be variations of the styles) because it can overwhelm the client, or they have a hard time concentrating on one they like most. Even as I am writing this post, I've found that the less I send the better. More than 4 doesn't work as well.

STEP 4: REFINING THE LOGO
After I present the logos, we discuss what they like and dislike about each. Which ones they love the most, and then we begin refining the colors, exact typography, proportions and nail down the final. I give clients two revision rounds so we can perfect the design. Sometimes one isn't even needed. However, if additional revisions are needed after the first two, it's no problem! I simply quote at my hourly rate for additional revisions, and I know many other designers happily do the same.

STEP 5: HAND OFF TO CLIENT!
As you can see, we didn't change anything drastic Amy's final round of designs. Amy loved the middle design from round two of edits, and we went with it! In the last step, I create a brand document with elements that Amy can use to keep her brand cohesive and consistent. This includes fonts, colors, and logo variations. I send this document to the client along with every file type they could need with instructions on when to use which one. (Hi-res, web-res, white with no background, EPS, JPEG, PNG, etc.)

And that's it! That is the logo design process I follow that works best for me and my clients.